
What are Google Shopping Ads?

Google Shopping ads are those advertisements that show up at the top of Google search and include details of items for sale, including an image, price, and other relevant information. You’ll see them in regular search pages as well as on the Shopping pages and on Image Search. You may also see them on the Google Display Network, Search Partner sites, YouTube, and price comparison apps. They appear when a user searches for a phrase that indicates they may be interested in buying an item – either now or in the near future.Although mostly used for online sales, Shopping ads can also be utilised for sales at brick-and-mortar stores too. So wherever you sell, this guide will be useful.
How to Set Up Shopping Ads: Google Merchant Centre
1. Create an account
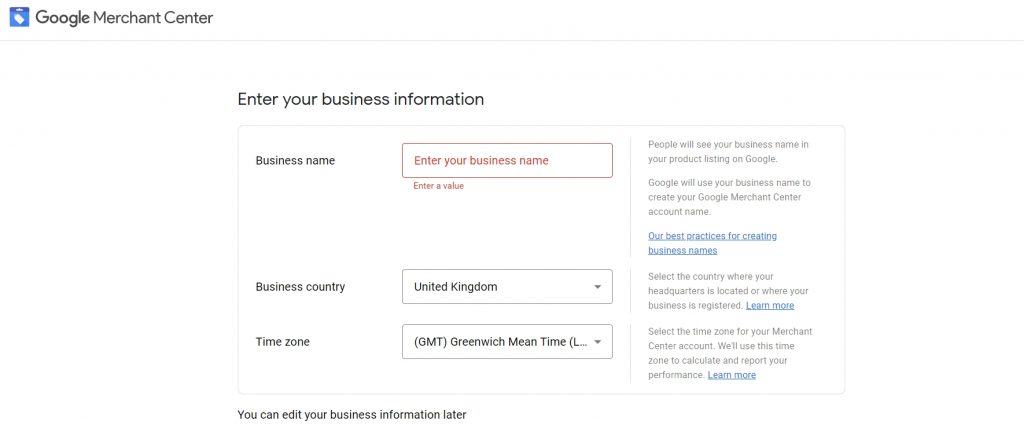
The first thing you need to do to start using Shopping ads is to set up a Google Merchant Centre account. This is where you will add all the product details that Google will then use to create your ads and display them to the right people.To start, head to Google Merchant Centre. If you already have an account with any other Google services, such as Gmail, select Sign In and enter your login details. If you’re completely new to Google, click Get Started and create an account. Either way, follow the simple instructions for the initial set up.2. Add business and shipping details
Although you will have entered some basic business details when you first signed up, you’ll need to enter some more information now, including business address and contact number. You should also provide information about shipping (such as where you’re able to deliver items).3. Verify and claim your website
For security, you’ll need to confirm that you own your website by adding your web address, and then choosing one of the verification methods. There are numerous ways of verifying, such as receiving a code to a business email address, or adding code to your website.4. Add products and product feeds
There are several ways you can add products to Merchant Centre. The one that requires the least amount of technical skill is to simply create a spreadsheet (either on Google Sheets or another programme), add all the information, and upload it directly to Merchant Centre. This is best used only if you have a small number of products, and be aware that you will have to manually update the spreadsheet and re-upload it every time there is a change to a product.The better way is with direct API integration. This is where Merchant Centre connects directly to your store and takes the required information directly, updating whenever your site is updated. If you use a popular store like Shopify or Woocommerce, then this functionality is already built in.Once the product integration is set up, you will have a primary feed, which is where, in most cases, all of your products will be stored. You should only need additional feeds if some of your products don’t meet Merchant Centre’s data and eligibility requirements.Integrating with Google Ads
 After setting up your Merchant account, you’ll need to link with Google Ads. If you haven’t already, set up an account with Ads.From Merchant Centre, select Settings (a cog symbol) at the top of the page, then Apps and services, and finally Add service. Select Google Ads on the sub-menu and, if you’re using the same email address in Merchant Centre and Ads, you will be able to link them directly. If you’re not using the same email address, select Account you don’t manage, enter the Google Ads Customer ID, and send a request to the admin address. The owner of that will then need to authorise access.Select Link to complete the setup.
Creating a Shopping Ad
You can take advantage of both paid and free listings with Shopping ads, and there are advantages and disadvantages to each option.Free ads don’t cost you anything. They’re perfect if you’re just starting out and want to get to grips with the system and learn a few things before committing to any kind of spend. However, you will get limited visibility and paid ads will get the prime positions.Paid ads include some kind of spend, which can vary vastly depending on your budget. If your ads aren’t well set up, then you could end up losing a lot of money without much gain. However, if you optimise your listings and make good choices, you can benefit from better ad positions, a wider range of advertising locations, and higher click-through rates.If you’re keen to set up paid Shopping ads but nervous about managing them, then get in touch to find out how I can help.1. Set up tracking
Before you start using Shopping Ads, you should set up tracking on your site. Use the code provided by Google Ads or Google Tag Manager. Without this, you won’t be able to see how well (or badly) your ads are doing, and so you can’t make improvements or demonstrate their success.Without tracking, some advertising options won’t be available in Shopping ads.2. Set up a free Shopping ad
To sign up for free listings, you just need to enter the data as described in How to set up Shopping Ads: Google Merchant Centre. To double-check you’re fully signed up, select Free listings from the left menu and look for a validation message.If you don’t see the validation, check again that you’ve entered all the required information.
3. Set up a paid Shopping ad
Paid ads need a little bit more work, but exactly how much will depend on your preferences.From the left menu, select Ad campaigns, then Create a campaign. You will be given the option to go directly to Google Ads to use more advanced features, or you can remain on Google Merchant Centre and stick with some basic options.If you stay on Merchant Centre, just follow the basic instructions to set up your ads.If you’re using Google Ads, click + Create, then Campaign, then select your main goal. Sales, Leads, and Website traffic goals all allow Shopping campaigns, or you can select create a campaign without a goal’s guidance.Select your conversion goals – you will need tracking set up to use these – then next.When selecting a campaign type, there are a couple of options.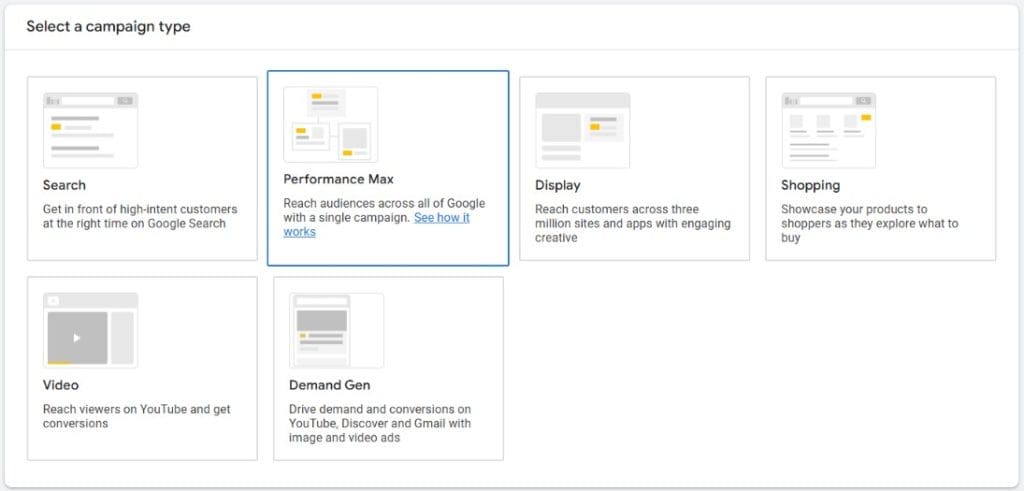 If you want the easiest, most hands-off approach, select Performance Max. Google will use its advanced machine learning to create and serve your ads. The advantage here is that Google may know more than you and so you might find that results are better. On the flip side, you’ll have less control over your ads, and won’t be able to tweak them to get better results. You also won’t have access to as much data.Alternatively, you can choose a standard Shopping campaign, which gives you much more flexibility to adjust your ads. This option requires more work on your part, as you will want to keep an eye on the results of your ads and make updates and changes as you go.If you’ve opted for Shopping ads, select where you want to advertise, and then select Single Product Ads and decide how to segment your adverts. You can choose All Products or subdivide by certain attributes such as category.